
Ah, the foam roller. The glorious foam roller.
After an extensive training session, it hurts so well to roll around on that hardened piece of foam. But apart from feeling so awesome on aching muscles it can also reduce chronic pain and rehabilitate a host of injuries.
The proper word for this method is called Self-Myofascial Release Technique (SMRT), and it really is the smart way to long-term regeneration.
Fascia is a sort of sheet of connective tissue that covers the muscles, bones, and joints. The entire body's structure is covered in a fascia layer, from organs to muscles to blood vessels.
When we overwork the muscles, the fascia layers can tear and turn into adhesions. This is when the layers of fascia stick together. These adhesions halt normal muscle development and can cause pain and discomfort.
The good news is that these adhesions can be released when we apply pressure, such as through deep tissue massage, mobility balls or foam rollers. When we release these tissues it creates a biochemical and mechanical change that provides the opportunity to become more flexible in the future.
[tweet_box design="box_8"]When we overwork the muscles, the fascia layers can tear and turn into adhesions.[/tweet_box]
Before getting into the specific techniques, there are some general rules to follow when practicing self-myofascial release.
You can easily spend 45 minutes on a full body SMRT session and it can be combined with any warm up/cool down, pre or post-exercise. Here are some techniques, but remember you can focus on any part of the body that needs attention. These next 5 Self-Myofascial Release Techniques are enough to make your body feel great again...

If you sit for long periods of time, this will help open up the hips, alleviating lower back pain.
https://www.youtube.com/watch?v=kRRebSYZQ_Q
Extend the thigh and place the foam roller in the groin region with your body face down. Be cautious when rolling near the adductor complex at the pelvis, do not roll on bone. Roll from pelvis to knee.
Foam rolling your hamstrings can lead to a significant increase in your general range of motion.
https://www.youtube.com/watch?v=lLswx0vSvtk
Place your hamstring on the roller with your hips unsupported. If you want to apply more pressure, you can cross your feet. Roll from your knee toward you posterior hip.
Rolling out the quads can also increase your range of motion significantly.
https://www.youtube.com/watch?v=Ukk_LNN_uPc
Place your quads on the foam roller with your body face down. Don't slouch! It's important to maintain proper core control, with tight abs and glutes. You don't want to overarch your lower back, which can cause additional injury. Roll from pelvic bone to knee.
Your IT band is connected to your knee, so when you loosen the muscles around your IT band, your kneecap starts to track correctly.
https://www.youtube.com/watch?v=RoHBDim_fzk
Position yourself on your side, lying on your foam roller. The bottom of your leg should be raised slightly off the floor. Keep your head in a neutral position with your ears aligned to your shoulders. Don't overdo this one. Keep it in moderation otherwise, you could injure yourself. Roll just below the hip joint down to the outside thigh and then to the knee.
Poor spine mobility is quite common from our slouching sedentary lifestyle. It can lead to tension in your neck, shoulders, lower back, and hips. This tension can then lead to bad posture, aches, and pain. Foam rolling your upper back can lead to better posture.
https://www.youtube.com/watch?v=nqttHdUXg_k
Place your hands behind your head and wrap your arms around your chest to open the shoulder blades. Raise your hips. Stabilize your head to a neutral position. Roll your mid-back area on the foam roller being careful not to roll on your bone or vertebrae.
After an extensive training session, it hurts so well to roll around on that hardened piece of foam. But apart from feeling so awesome on aching muscles it can also reduce chronic pain and rehabilitate a host of injuries.
The proper word for this method is called Self-Myofascial Release Technique (SMRT), and it really is the smart way to long-term regeneration.
Let’s first deconstruct this word and technique
Fascia is a sort of sheet of connective tissue that covers the muscles, bones, and joints. The entire body's structure is covered in a fascia layer, from organs to muscles to blood vessels.
When we overwork the muscles, the fascia layers can tear and turn into adhesions. This is when the layers of fascia stick together. These adhesions halt normal muscle development and can cause pain and discomfort.
The good news is that these adhesions can be released when we apply pressure, such as through deep tissue massage, mobility balls or foam rollers. When we release these tissues it creates a biochemical and mechanical change that provides the opportunity to become more flexible in the future.
[tweet_box design="box_8"]When we overwork the muscles, the fascia layers can tear and turn into adhesions.[/tweet_box]
The 4 Key Rules for SMRT
Before getting into the specific techniques, there are some general rules to follow when practicing self-myofascial release.
- Always proceed with caution. Don’t go rolling willy-nilly, over bone and at a fast pace. Take it easy and locate tender areas.
- When you do locate a tender point, stop rolling and rest there until the pain decreases by at least 75% (i.e. 10 to 20 seconds). Remember that it’s the pressure, not the rolling that smooths out fascia.
- To apply more pressure use only one appendage at a time, for example, when rolling your hammies, put your foot on your thigh to apply more pressure.
- You will most likely feel pain in certain areas. This is normal as releasing adhesion is no walk in the park. Just remember to be controlled and slow, pausing when necessary. Just remember not to apply pressure to the bone, only muscle.
What you can use
- Foam roller. Any foam roller will do, but I recommend one with PVC piping in the middle as it holds its shape for longer.
- Mobility ball. A lacrosse ball is a good option if you can’t get your hands on a proper mobility ball.
Self-Myofascial Release 101: 5 Techniques You Have to Know and Use Every Day -- Be SMRT!
You can easily spend 45 minutes on a full body SMRT session and it can be combined with any warm up/cool down, pre or post-exercise. Here are some techniques, but remember you can focus on any part of the body that needs attention. These next 5 Self-Myofascial Release Techniques are enough to make your body feel great again...
1. Adductor
If you sit for long periods of time, this will help open up the hips, alleviating lower back pain.
https://www.youtube.com/watch?v=kRRebSYZQ_Q
Extend the thigh and place the foam roller in the groin region with your body face down. Be cautious when rolling near the adductor complex at the pelvis, do not roll on bone. Roll from pelvis to knee.
2. Hamstring
Foam rolling your hamstrings can lead to a significant increase in your general range of motion.
https://www.youtube.com/watch?v=lLswx0vSvtk
Place your hamstring on the roller with your hips unsupported. If you want to apply more pressure, you can cross your feet. Roll from your knee toward you posterior hip.
3. Quadriceps
Rolling out the quads can also increase your range of motion significantly.
https://www.youtube.com/watch?v=Ukk_LNN_uPc
Place your quads on the foam roller with your body face down. Don't slouch! It's important to maintain proper core control, with tight abs and glutes. You don't want to overarch your lower back, which can cause additional injury. Roll from pelvic bone to knee.
4. IT Band
Your IT band is connected to your knee, so when you loosen the muscles around your IT band, your kneecap starts to track correctly.
https://www.youtube.com/watch?v=RoHBDim_fzk
Position yourself on your side, lying on your foam roller. The bottom of your leg should be raised slightly off the floor. Keep your head in a neutral position with your ears aligned to your shoulders. Don't overdo this one. Keep it in moderation otherwise, you could injure yourself. Roll just below the hip joint down to the outside thigh and then to the knee.
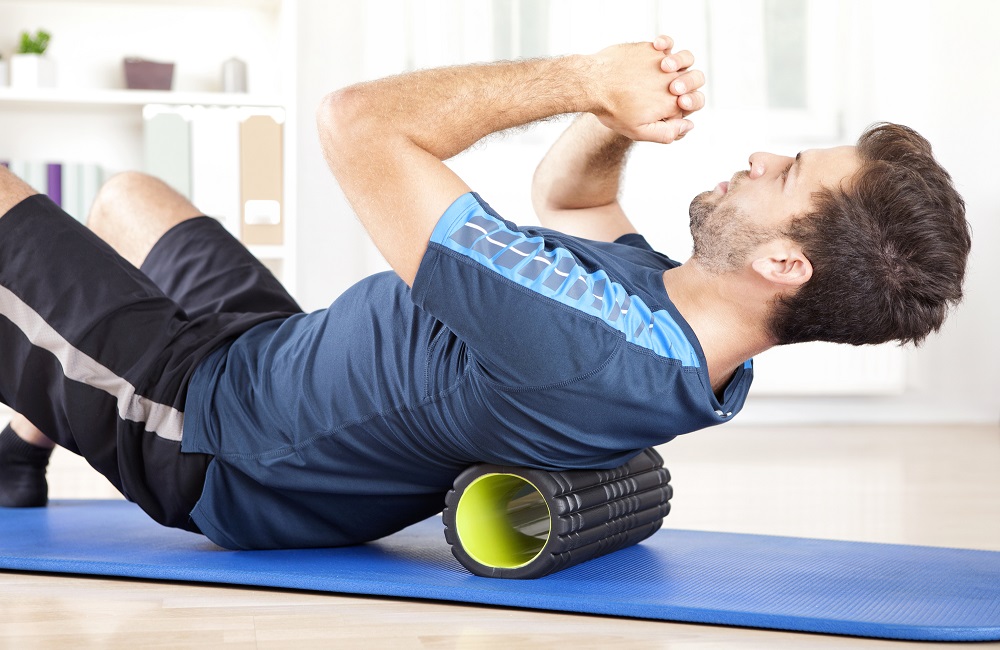
5. Upper Back (Thoracic Spine)
Poor spine mobility is quite common from our slouching sedentary lifestyle. It can lead to tension in your neck, shoulders, lower back, and hips. This tension can then lead to bad posture, aches, and pain. Foam rolling your upper back can lead to better posture.
https://www.youtube.com/watch?v=nqttHdUXg_k
Place your hands behind your head and wrap your arms around your chest to open the shoulder blades. Raise your hips. Stabilize your head to a neutral position. Roll your mid-back area on the foam roller being careful not to roll on your bone or vertebrae.


